
Published - 7 months ago | 6 min read
How to Build an AI Agent in 10 Minutes With Google ADK
AI agents have moved from being experimental demos to practical tools that developers use daily. These agents can call APIs, search the web, follow multiple steps, and work together inside a workflow. The surprising part: you can build an AI agent from scratch in a few minutes using Google’s Agent Development Kit (ADK).
7M+ developers using Gemini APIs (5x YoY growth), ADK taps this momentum. Everything runs locally. You don’t need any special hardware or a long setup.
This guide follows a simple progression with instructions that match the way engineers actually work. The goal is to get a functioning, testable agent running fast, then expand it into a small multi-agent system.
What is an AI Agent?
An AI model answers your question.
An AI agent performs a task.
An agent can run tools, store intermediate outputs, execute steps in a defined order, or hand work to another agent. When you build an AI agent, you're defining a small, self-contained worker that uses an LLM for reasoning and a toolset for execution. In ADK, every agent is defined by:
- A model
- An instruction
- Optional tools
- Optional output key
That’s the entire blueprint.
Now let’s build the first one
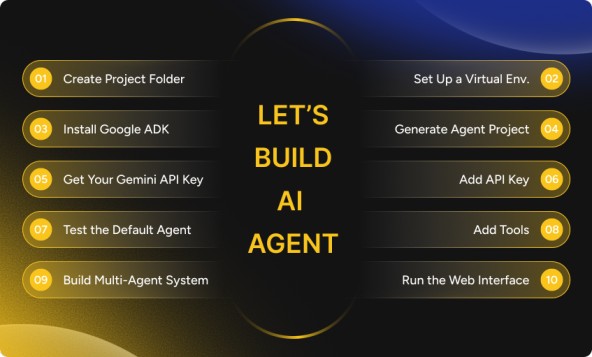
Step 1 — Create Your Project Folder
Open your terminal and name your folder anything you like. The reference tutorial uses my_first_agent:
mkdir my_first_agent
cd my_first_agent
This folder will hold everything — your agent file, your environment variables, and later the multi-agent logic. Keeping everything inside a clean directory ensures ADK creates a predictable structure.
mkdir my_first_agent
cd my_first_agent
This folder will hold everything — your agent file, your environment variables, and later the multi-agent logic. Keeping everything inside a clean directory ensures ADK creates a predictable structure.
Step 2 — Set Up a Virtual Environment
Create the virtual environment:
python -m venv .venv
Activate it:
source .venv/bin/activate # macOS/Linux
.\venv\Scripts\activate # Windows
Why this matters:
ADK and model libraries update frequently. A clean environment isolates dependencies so you don’t run into version mismatches when you create AI agent systems in the future.
If activation works, your terminal prompt should show (.venv) at the beginning.
Step 3 — Install Google ADK
Now install ADK:
pip install google-adk
This installs the tooling needed to define agents, attach tools, run them in the terminal, and launch the optional web UI. The installation normally takes a few seconds.
If the command ends without errors, you’re ready for the next step.
pip install google-adk
This installs the tooling needed to define agents, attach tools, run them in the terminal, and launch the optional web UI. The installation normally takes a few seconds.
If the command ends without errors, you’re ready for the next step.
Step 4 — Generate the Agent Project
Inside your folder, run:
adk create my_agent
ADK will ask you to select a model. Pick any available Gemini model. Free-tier users usually choose something like Gemini Flash or Gemini 2.5 Flash Lite.
If everything is correct, ADK creates this structure:
my_agent/
├── agent.py
├── .env
└── __init__.py
- agent.py is the main script containing the agent’s definition.
- .env holds your API key.
- Nothing else is added, the project stays intentionally minimal.
This is the same setup seen in the original reference blog.
Step 5 — Get Your Gemini API Key
Visit:
https://aistudio.google.com
- Sign in with your Google account.
- On the left sidebar, click Get API key.
- Click Create API Key in the top-right corner.
- Name it.
- Choose or create a project.
- Click Create Key.
You’ll now see a page showing your key with a small copy icon.
Click the icon to copy it.
Keep this window open if you need to regenerate it later.
Step 6 — Add Your API Key Into the Project
Open your .env file and add:
GOOGLE_API_KEY="your-key-here"
Save the file.
ADK automatically loads .env, so no further configuration is required. This is why ADK is so quick for beginners; the environment setup is handled for you.
At this point, you already have everything needed to build an AI agent and run the default version.
Step 7 — Test the Default Agent
Open agent.py.
You will see boilerplate code with a placeholder model name. Replace it with the model you selected earlier:
model="gemini-2.5-flash"
Now run the agent:
adk run my_agent
If the install and key are correct, you’ll see an interactive terminal.
Type something simple:
What is the latest version of the iPhone?
If you get an error about quota limits, switch the model to:
gemini-2.5-flash-lite
Your goal here is not accuracy, only to confirm that the agent responds. This step mirrors the original reference blog exactly: test early, test small, make sure the base agent works before adding tools.
Once you see an answer, you’ve completed the first meaningful milestone: you successfully used ADK to create AI agent behavior with only a few lines of configuration.
Step 8 — Add Tools (Google Search)
Right now, the agent answers based on internal model knowledge. To give it real-time accuracy, attach tools.
Add this import:
from google.adk.tools import google_search
Then add the tool to your agent definition:
tools=[google_search]
Run the same prompt again:
adk run my_agent
Ask:
What is the latest version of the iPhone?
Now the agent uses Google Search before generating an answer.
In the original video, this step corrected the output from “iPhone 15” to “iPhone 17” because the model pulled current data.
This is the moment where your project stops being a basic chatbot and becomes a functional agent, one reason developers prefer to build an AI agent instead of relying on plain LLM prompts.
Tool availability may vary depending on the user’s API quota and model permissions.
Step 9 — Build the Multi-Agent System
Now for the part that impresses most people: building a small system of agents that work together.
You'll create three agents inside agent.py.
1. Research Agent
Responsibilities:
- Use Google Search
- Collect top results
- Store output in research_result
Instruction style used in the reference:
You are a research agent.
Your only job is to use google_search to find the top 5 results.
Do not answer user questions directly.
2. Summarizer Agent
Responsibilities:
- Take research_result
- Write a summary
- Output summary_result
Reference-style instruction:
Read {research_result} and create a short summary.
Include links from the results.
3. Coordinator Agent (Root Agent)
Responsibilities:
- Accept user input
- Delegate to Research Agent
- Pass results to Summarizer Agent
- Produce the final response
To make the coordinator call other agents, wrap them with:
AgentTool(research_agent)
AgentTool(summarizer_agent)
The final structure in your file will look like:
Root Agent → Research Agent → Summarizer Agent → Final output
This mirrors the entire flow seen in the reference blog and the transcript: the coordinator delegates;
the research agent gathers; the summarizer compresses; the coordinator returns the final answer.
At this point, you haven’t just managed to create AI agent behavior, you’ve built a small multi-agent system.
Step 10 — Run the Web Interface
The terminal won’t show you how agents talk to each other.
The ADK web UI does.
Run:
adk web --port 8000
If everything is correct, you’ll see a green success message with a local URL.
Open it in your browser.
Select your agent from the dropdown.
You’ll see:
- The exact moment the coordinator calls the research agent
- The outputs passed to the summarizer
- Each step in order
- Final compiled response
This interface is the easiest way to understand agent behavior, especially when debugging instruction order or tool usage.
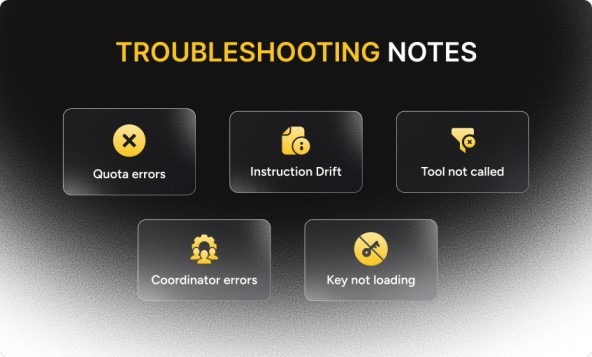
How to resolve Errors?
The most common issues:
Quota errors
→ Switch to a lighter model like flash-lite.
Agent ignores instructions
→ Add more explicit wording.
Tool not called
→ Confirm it’s added to tools=[...].
Coordinator errors
→ Ensure sub-agents are wrapped with AgentTool().
Key not loading
→ Check that .env is formatted correctly and contains quotes.
These are normal when you build an AI agent for the first time.
Conclusion
You’ve created a fully working agent, added real-time tools, and built a multi-agent pipeline — all in a few minutes. ADK keeps the setup predictable: one folder, one key, one main file. Once you’re comfortable with these steps, you can extend your system with more agents, workflow logic, or even API integrations.

Written by / Author
Manasi Maheshwari
Found this useful? Share With
Top blogs
Most Read Blogs
Wits Innovation Lab is where creativity and innovation flourish. We provide the tools you need to come up with innovative solutions for today's businesses, big or small.
© 2026 Wits Innovation Lab, All rights reserved
Crafted in-house by WIL’s talented minds